Wednesday, September 30, 2009

Used Jar Lids


Over and over again I read posts about ways to reuse jar lids.  Let me state clearly that the USDA and the National Center for Home Preservation at University of Georgia Do Not Recommend Ever Reusing Jar Lids In Canning.

  • Yes, maybe your Grandmother and your Aunt Mable reused lids and they did not die from eatting their hundreds of jars of canned food. 
  • Yes, maybe you have read about ever so carefully removing lids and running your finger along the edges to ensure they do not have any dents. 
  • Yes, maybe you boil them in baking soda or add in a bit of eye of newt to refresh the seal.
All of these options are wives tales and are not safe canning practices.Lids are manufactored to be used once and once only. Some of these methods are derived from the days when glass domes and rubber gaskets were used.  Use of glass lids and rubber gaskets are now considered the olden days and modern technology  and testing has proven these methods are no longer recommended and safe.

So you say, "But Frugal Fraulein, what do I do with all those lids?  It seems like such a waste!".  Here are some suggestions.  First mark used lids with a large X with an indelible marker.
  • Use the lids to store leftover food in canning jars in the refrigerator.
  • Sore dry goods in canning jars.  Take food out of cardboard packaging for longer shelf life and to deter bugs and furry critters.  It iss helpful to be able to see inside of jars to see what is hidden within.
  • Use jars to store nails and screws and small objects in the shop. Attach the lid and ring to the underside of shelves and simply screw off the jar.
  • Make attractive shelves or buy them at the craft store and decorate.  Attach lid and ring to underside and insert small toys or candy and give as creative useful birthday party gifts.
  • Store sewing goods like bobbins, straight pins, safety pins and  thimbles.
  • Store spices and dried herbs in canning jars.
  • Store dried foods in canning jars.
  • Make piggy banks out of canning jars by carefully cutting a slit in a used canning lid.  Kids can see how their money is growing.
  • Make into a hanging mobile or windchime by punching holes with an awl and painting or stenciling the lids then stringing them up.
  • Make craft items with the kids.
  • Paint and use for coasters.
  • Use lids to mix small amounts of craft paint.
  • Use lids to hold beads while beading.
  • Paint names of plants on one side and fit between prongs of old forks.  Stick forks into garden or potted plants as markers.
  • Hot glue onto bambo or treated garden sticks and use as plant or row markers.
  • Shingle the roof of a bird house with used lids. 
  • If TSHTF we might all be reshingling our homes with used lids.
  • Store seeds in jars with used lids.
  • Make coasters for under furnature legs to protect wooden floors and deep carpet.
  • Store small amounts of paint in jars with used lids and take large paint cans to local HAZO House. Dab some of the paint on the top of the lid so colors can be matched at a later date.
  • Make holiday lighted decorations by adding led stringed lights to canning jars and decorating.
  • Hang used lids off fruit trees to scare off birds.
  • Make mixes in a jar and give as gifts.
  • Punch holes in a lid and use for bug catching jars or specimen jars.
  • Make safety reflectors for driveway by spraying with reflective paint and adherring to post or tree.
  • Make kitchen magnets by gluing a small magnet on the back and painting or decoupaging lid.
  • Punch with a hammer, awl to make punched tin decorations and attach to the front of a hutch or wooden cabinet for country look.
  • Glue a school picture inside and make annual christmas tree ornaments.
  • Use them with vaccum sealer to seal dry goods.
  • Use as saucers for potted plants.
  • Make gift tags. Great to use when giving away canned goods that have domed fabric on top.  Make hole in lid and attch with raffia or ribbon.
Here are some other facts about canning jar lids.
  • Ball, Kerr, Golden Harvest, and Bernardin brands are now manufactored by the same company Jardin Home Brands.
  • During WWII in order to save metal for the war effort, the canning jar companies made jars using a 63mm opening.  Current lids and rings do not fit these jars.  When buying older jars at yard sales beware what size you are buying.  I made the mistake of buying some and getting stuck without lids and rings.
  • Manufactorers state new lids have a shelf life of up to 5 years and I have read reports of people successfully using lids that were stored up to 25 years. The proof is always in the pudding. If they leave little particles in the pan when they are being heated you know there is a problem.
  • Watch out for lids that were stored in hot warehouses that are all stuck together when you take them out of the box. Separating them could cause knicks in the sides and make them unusable.
  • If you are unsure about the viability of the lid, discard it and use it for another purpose other than canning.
  • Jarden Corporation, maker of Ball and Kerr lids, recommends, “apply bands just until a point of resistance is met – fingertip tight.” If ring bands are screwed on too tightly, the lids will buckle and may forfeit the seal. If bands are not screwed on tightly enough, a seal may not form.
  • Jarden Home Brands manufacturer of home canning lids: Ball, Kerr, Golden Harvest, and Bernardin brands follow the same rigorous FDA standards used by the commercial food packaging industry. Like the majority of commercial food packagers using glass jars with metal closures and metal sanitary cans, the coating on our home canning lids is designed to protect the metal from reacting with the food it contains. A small amount of Bisphenol A is present in the coating. The FDA does not limit Bisphenol A in commercially packaged foods, and is aligned with the international scientific community’s position that a small amount of Bisphenol A in contact with “canned foods” is not a health concern for the general public
  • Jarden Home Brands knows that product quality and safety play important roles in your purchasing decisions. So, we understand your concern regarding recent reports from Canada about Bisphenol-A (BPA) found in some plastic food contact products. Bisphenol-A is a synthetic chemical compound primarily used to make polycarbonate plastic containers. Please be assured that plastic food storage containers (freezer containers/freezer jars) and plastic food contact articles (cutlery, straws, serving/canning utensils and canning storage caps) marketed by Jarden Home Brands and as provided to our private label companies do not contain Bisphenol-A (BPA).
  • There are at least thirty different manufacturers of canning lids in the world.
  • One piece lids were not made for home canning.
  • Do you have any suggestions for used canning lids??  Enter them below by clicking on Comments.


Tuesday, September 29, 2009

Bread and Butter Pickles


I love all pickles but my favorite are homemade Bread and Butter Pickles.  The sweet, spicy, pungent vinegar flavors are so good with a turkey sandwich made with my own canned turkey.  Just thinking about it makes my mouth water.


As a young child, I remember going to McClain's Fishmarket in Marblehead, Massachusetts to see my Grandmother, Mamie.  Mamie worked at the fishmarket.  They had two huge wooden barrels one for sour pickles and one with dill pickles.  These pickles were huge, fat and juicy.  For a nickle the pickle would be wrapped in butcher paper and one could nibble on it all afternoon.  I favored the dill pickle and as an adult I acquired a taste for the mouth puckering sour pickle.  Those sour  pickles produced some great screwed up faces and would have made a great photo study.  Thanks to Dan Dixey for posting this picture on his Facebook page at Marblehead Historic Images!

My mother also loves pickles and often receives a large jar under the Christmas tree as a present.  She even uses a jar to hold her pantry door shut so her dachshund, Tinker will not get in and get into trouble.

This year I used the Bread and Butter recipe and substituted zucchini for cucumbers.  Here is my favorite recipe.  It is easy to make these pickles and the only hard part is waiting a couple of weeks before opening first jar!

8 lbs. cucumbers
2 lbs. white onions
1/2 cup canning salt
1 quart vinegar
2 cups sugar
2 teaspoons celery seed
2 teaspoons turmeric
1 teaspoon dry mustard
Slice unpeeled cucumbers 1/8-1/4 inch thick. Slice peeled white onions 1/8 inch thick.
In a large stockpot, arrange cucumbers in layers, sprinkling each layer with canning salt. Let stand for 3 hours; rinse in cold water and drain in colander.
Bring vinegar and remaining ingredients to a boil. Add vegetables; bring to a boil again and boil for 5 minutes.
Pack into hot, sterilized jars, leaving 1/4 inch headspace. Adjust caps. Process in a boiling water bath canner for 10 minutes.

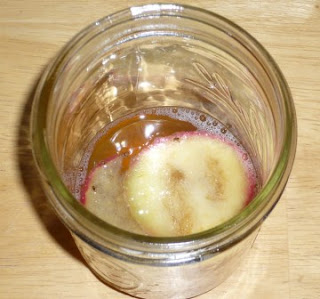
By the way, the canned bread and butter pickles in the picture were canned in 2007!  They are still yummy.

Buyer Beware

I have been writing some articles for other blogs and newsletters.  This particular article is very appropriate for my blog.  It was published today on http://thesurvialistblog.net which is very well authored by CD Creekmore.   I have recommended this blog before as a good source of interesting articles. Please check it out!


Although I tout the virtues of shopping at yard sales for canning equipment, it is time to give some words of caution. Know what you are buying! All canning equipment was not created equal.

Hot water bath canners are fairly simple to examine. Hot water bath canners are meant to can high acid foods like fruits, jams, jellies, preserves, pickles, relish and tomatoes. Hold the canner up to the light. Can you see any light peaking through? Is it extremely rusted? Is it dented? Does the lid fit? What size is it? Will it hold a double layer of jars? Are the handles made so that it will be easy to lift when full of water?

Hot water bath canners come in aluminum, enamel and stainless steal. Since the water does not enter the jars and touch the food, an aluminum canner is safe to use.

Test a used water bath canner by filling it with water to ensure it does not have any leaks. Leave it in the sink for awhile. Then put it on the stove and heat the water to boiling. If there aren’t any leaks and if the lid fits so that the steam does not escape and if the handles are sufficient so that you can lift it safely, you may have scored a useful find.

When you are finished canning, always dry out the canner and put it safely away in a dry place.

Pressure canners need careful examination and decision making before buying. Pressure canners are used to can low acid foods like vegetables, meat, poultry, fish, soups, stews. Don’t think because the pressure canner is being sold that it is safe. There are many factors to consider. First how old is the canner? What condition is it in? Is the brand name familiar? Is the instruction booklet with it? Is the weight with it? Are the handles in good condition? Are there signs of staining around the seal?

Let’s be more specific. Does the age matter? Yes. If the cooker was made prior to 1960 it was probably manufactured using a process called die-casting. Molten metal, most likely aluminum, was poured into a mold to create the pot. This was the standard manufacturing process during and after WWII, and such pans are not of the same quality as those made today. Modern manufacturing makes pressure cookers from rolled and stamped metal sheet that form the pot from one single piece of metal.

Cast metal is brittle and it is subject to tiny, microscopic cracks or thin spots which weaken the container. Pots and pans take a lot of abuse, they get banged around and they get dropped and may result in cracks in the metal. All these tiny fracture lines or hairline cracks are microscopic and they can only be picked up through industrial X-ray, they are not visible to the naked eye. While you might be able to use that old cooker safely for a while, eventually such a fault will cause a failure, sometimes with catastrophic results.

The only way to be sure if an old pressure cooker or canner is safe is to send it back to the factory for testing. The original manufacturer - although sometimes other manufacturers may be willing or have the special equipment to test other brands. Be prepared to pay a small fee, plus round trip shipping costs to have it tested for unseen faults. Be sure to call the manufacturer first, if they are no longer in service then Presto of Mirro may offer testing on some models.

Also check with your country or university extension office. Often they will provide this service, although it may only be offered at certain times by appointment as the testing equipment travels from place to place.

Check for the brand name. If it is not a common name then it might be difficult to get parts or be able to send it back to the manufacturer for inspection. Stick with an American brand name like Presto, All American, Wisconsin Aluminum Foundry or Mirro. Foreign brands may be difficult to track down and more difficult to get parts from.

If it is a weighted canner is the original weight with it? It is important to use the same kind of weight designed for that model. I collect old weights and there are subtle differences that could affect being able to calculate the correct pressure.

Are the handles in good condition? Older canners had wooden handles and over the years they become brittle and crack. Check with the manufacturer to see if the handles can be replaced and at what cost. I had the handles break on an older canner once while canning and it was extremely difficult to get the lid off and remove the jars. It was extremely hard to pick it up as well once the handles had broken. That canner became a planter in my garden collection of canning pot planters.

Are there signs of staining around the seal? If so possibly this canner leaked and did not seal tightly. Always get a new gasket for a used pressure canner. No matter what story the seller tells you always be on the safe side. Improperly canned foods can be fatal or worse make you sick as a dog. Make sure you can find the model number so you will be able to order the right gasket. Take pressure canners in to have gauges checked annually by your local County Extension Agent. To find your local County Extension Agent go to http://www.csrees.usda.gov/Extension/

Have I frightened you away from buying a used pressure canner? Good that is what this article was meant to do. Study up or better yet do not buy an old pressure canner. Invest the money in a new model and save yourself time, money and most importantly your safety. New models are technologically safer and will inherently have fewer problems.

Please go to http://missvickie.com/ to read all about pressure canning. Miss Vickie is the Queen of pressure canning and pressure cooking information. When I grow up I want to be just like her! Thank you Miss Vickie from the Frugal Fraulein at http://frugalcanning.blogspot.com

Fall Garden Soup


There were 5 large zucchini squash leftover from my garden and I still have cherry tomaotes ripening every day.  I pondered what to do with the garden leftovers and decided to make a veggie and hamburger soup. 

The zucchini, yellow squash, onions, tomatoes, cilantro, oregano, thyme, parsley all came from my garden.  I added some corn, green beans, browned and drained hamburger, garlic powder, chili powder, seasoned salt, black pepper, tomato paste and beef bullion and filled my largest stock pot to the brim.  It simmered all day and filled the house with a fall like aroma.  Since I just threw in a bunch of this and that I am unable to post a complete recipe.  I usually cook by taste and fiddle with a dish till it tastes good.

We had soup and bisquits for dinner followed by some pear cobbler.  Tomorrow morning the leftover soup will be heated and pressure canned into pint jars perfect for lunches.  Soup will be pressure canned for 75 minutes at 10 pounds of pressure.


Please go to University of Georgia Soup Safety to read up on canning soup before canning any homemade soup.  Remember not to use and thickeners, pasta, rice, noodles in soup as they will will interfere with the density of the soup.  These ingredients can also clog up your pressure cooker vents and you won't get accurate readings.  I tried canning turkey rice soup once before I read the USDA guidelines and I got a white thick mess that was not appetizing at all.  Had to learn the hard way I guess.

I am working on a list of great soup recipes that can be canned and it will be posted soon!

Saturday, September 26, 2009

Asian Plum Sauce


I had a large box of beautiful Pluot Plums given to me this weekend.  Pluots are a hybrid of plum and apricot and are abundant in vitamin C, A and high in fiber.  The plums are a rich purple red color, juicy and firm.

The plums were pitted and cut and I realized just how much there actually was. I was going to have to triple the batch!  It is not recommended to double a batch when making jam, jelly or preserves but since I was going to pressure can the sauce I took the chance.  The plums were put into the blender to hasten the process then the onions were pureed. The sauce fit into a very large pots and was slowly cooked down till it thickened. 

The smell was delicious and made me want to make eggs rolls. Plum sauce is great to cook with chicken and pork. 

When chicken tender pieces are on sale for 99 cents a pound, I buy a 10 lb bag and freeze them in smaller packages.  I thaw the chicken tenders and put them in a roasting pan and cover them with the plum sauce and bake in a 350 degree oven for 40 minutes or until they are done.

My friend Peggy likes to buy the chicken tenders and can them in the plum sauce.  She uses the canned chicken to make enchilladas with a sweet tangy taste.  I have also canned chicken this way and I used the plum chicken cut up in fried rice.  Yummy!

 ASIAN PLUM SAUCE

8 cups pitted and chopped plums
1 3/4 cups packed dark brown sugar
1/2 cup white sugar
2/3 cup cider vinegar
1/2 cup finely chopped onion
1 medium jalapeno pepper -- finely chopped
4 teaspoons mustard seed
2 teaspoons salt
6 cloves garlic -- minced
2 tablespoons minced ginger -- or 1 tbsp. powdered ginger

Bring all ingredients except plums to a boil in a non-aluminum pan. Stir in plums. Simmer until thick, stirring often. Mash with a potato masher or blend if you want a smoother sauce. I added a pat of butter to reduce the foaming as it cooked down.

To can: Fill hot, clean jars with hot sauce, leaving 1/4" headspace. Wipe rims, adjust lids and process in a boiling water bath for 20 minutes at 0-1000 ft., 25 minutes, 1001-6000 ft., or 30 minutes, above 6000 ft. Makes about 6 half pints

Friday, September 25, 2009

Thank You Readers

A new feature has been added called FEEDJIT Live Traffic Map to view where readers come from. I was amazed that people from Romania, United Kingdom, France, Malaysia, Australia, Indonesia, Canada and many states in the United States have found the Frugal Canning blog.  Thank you to each and every one of you for coming to visit and taking a moment to read. 

Please share the blog with your friends and sign up to be a Follower.  Counting my Followers and knowing they took a moment to complete this action is an inspiration to me to keep going.  Simply click on the Follower button and follow the directions. It is simple. 

Also, please leave comments either good or bad.   I would like to know what you are interested in and what questions you have. I answer all emails.  Once I become more familiar with the technology behind blogs I will offer an email option so readers know when new postings are available.  Bear with me....baby steps.

I am writing an Ebook on canning and will have it finished soon.  It will be full of tips to save you time and money while preserving great food for your family.  I am so excited about this project that I have not been to bed before 1 am in a couple of weeks!  Stay tuned and my appreciation again!  Thank you and keep doing the Can Can!

Thursday, September 24, 2009

Anti-Viral Anti-Flu Tincture


I attended a class taught by an experienced herbalist the other evening. She has studied herbal remedies for many years and uses them with her family to ward off many ailments. It was fascinating since I am a complete novice to herbal remedies. With the cost of healthcare escalating and health services being manipulated by large drug companies whose goal is to repeatedly treat not cure, I am going to begin to study this field. I can not guarantee that this tincture works. Use your own knowingness. When in doubt always contact your physician.

The following recipe will make about one gallon of tincture. You can half or double the recipe according to your families needs. It is suggested you make it the first time with a friend because the herbs are sold in bulk and you may want to share to save costs. Some health food stores carry these herbs or you can shop online.

Ingredients
2 oz. comfrey                       1 oz. uva ursi
1 oz. lobelia                         1 oz. white oak bark
1 oz. marshmallow root       1 oz. wormwood
1 oz. mullein leaves             1 oz. black walnut leaves
1 oz. skullcap                       ½ oz. black walnut hulls

Step One
Measure herbs and place in a ceramic or glass container. Only use stainless steel if using metal. A gallon canning jar works well. Cover with about 2 ½ quarts (more if needed) of unprocessed apple cider vinegar. Braggs is a good brand. Buy the best you can get and make sure it is apple cider vinegar not some imitation. Set his mixture in a dark cool place. Shake 2-3 times a day for 2 weeks. Don’t forget to shake it!

Step Two
Peel 1 ¼ pounds of garlic and blend or chop. Place the garlic in a large bowl and pour enough apple cider vinegar over the garlic to make a thick soup like mixture. Place this mixture in quart jars (will fill 2 quart jars). Put garlic mixture by your herb mixture and shake it when you shake the herb mixture. Shake 2-3 times daily for 2 weeks.

At the end of two weeks strain both mixtures well. A muslin cloth works as a strainer as does a point strainer bag. Squeeze all the moisture to of the herbs. Combine the herb liquid and the garlic liquid in a large stainless steal pot or glass container. To this mixture add 2 cups raw honey (not processed) and 3 cups vegetable glycerin (tincture will be effective if the vegetable glycerin can not be located).

The tincture is a powerful anti-viral and anti-bacterial mix. It also helps build the immune system. Store tinctures in a cool dark place in dark colored bottles if possible.

To keep immune system strong take a few ounces each day. If the flu is going around take a bit more and increase the dosage. Use your knowingness to determine the actual amount. It is recommended you start with a small dose and increase gradually. Tincture can be diluted with water or juice to make it more palatable. Tincture has a sweet apple juice flavor.


For those that do not want a strong garlic flavor. Store herb tincture separately and add a few drops of the garlic tincture to taste. Five drops is recommended.  When the tincture if finished I will post pictures of the final product.

Wednesday, September 23, 2009

Fruit Flies


Ok I have had enough.  The little beggars are all over the house.  It is time to go to war.  I have called to the Fruit Fly OverLords and given them fair warning to vacate or be evicted..... my way.

I fully acknowledge I am to blame for bringing in the little critters into the house and providing a banquet for them to feast upon.  I have canned up a storm this year and brought in lots of fruit and vegetables.  I don't always get the dishes done immediately (I can see my Mother nodding her head at that confession!).  The trash barrel does not have a lid.  There are house plants in every room although I did cover all the soil with a layer of sand last year to keep them from settling for the winter.  The compost pile is due to be turned and has the canning odds and ends right on top and exposed.  I left a bottle of wine uncorked on the counter the other night (don't read into that at all - it was just a mistake).

Tonight I have had enough.  While I was on my laptop in the livingroom, they were flying all over the screen. When I went to finish the last of my nightly cup of green tea there were three floating in it. Yuck, I almost swallowed them.


I do have cider vinegar in a canning jar on the ledge behind my sink and I have done that for years to rid the kitchen of fruit flies.  Obviously this year I have hit the mother load and need to take more drastic measures.  Between flight paths going in front of my screen, futile swats in the air and a bit of swearing, I got online and began to read about ways to get rid of fruit flies.  Now I don't condone killing - usually - but in this case it is me or them.  Until the temperature drops and Fall arrives, I will have to take up arms and attack.  Before you read this list view this short video.  It will surely inspire you to take action.

 http://www.wonderhowto.com/how-to/video/how-to-zoom-into-the-eye-of-a-fruit-fly-160038/

Here are some of the remedies I came across.
  • Put all produce in the refrigerator, zip lock bag or airtight container.  That means all fruit and vegetables.  Remember the potatos and onions.
  • Clean all bottles of liquids in the pantry.
  • In the olden days linen cloths were decorated with lace and beads or buttons were applied to the edges to hold the cloth down over the edges of a fruit bowl prohibiting bugs from entering and landing on fruit, foods and beverages.
  • Do not leave dirty dishes in the sink.
  • Regularly pour some bleach down the sink to kill anything feasting on bits of food caught in the drain.
  • Nightly clean all counters and dish drainer with a weak solution of bleach and water.
  • Keep trash in a tightly covered receptical or keep the trash bag tied.
  • Wash trash containers often with bleach and water.
  • Put pet food away at night.
  • Pour vinegar, wine, brandy in a bowl or jar and put a little dish detergent on top to catch the flies while they land to drink.
  • Made a funnel out of paper and put the funnel into the jar to catch the flies and make it more difficult to get out of the jar.
  • Secure plastic wrap tightly over the bowl or jar filled with vinegar or wine and punch a few very small holes in it. They will have difficulty getting out.
  • Secure a plastic bag of water over the doorways to your home.  Southerners swear flies and bugs of all kinds will avoid this doorway.
  • Remove fresh flowers.  Fruit flies are looking for sugar and will go for flower nectar.
  • Take a hair dryer, turn it on and aim it at the fruit flies.
  • Suck them up with the shop vac then empty the shop vac far away from the house.
  • Spray them with hairspray or water and when they fall to the counter squish them.
  • Put rotten fruit in a canning jar and wait for several to land on the fruit.  Quickly put your hand over the top and trap them.  Walk far away from the house and let them go.
  • Clean under the dishwasher and stove.
  • Cut a plastic pop bottle half way down the neck of the bottle.  Invert the cut piece and stick it into the bottle creating a funnel.  Add some wine or vinegar to make a trap.
  • Before bed put a piece of rotten fruit in the dishwasher or some vinegar.  Wait a while.  Then quickly close the door and turn on the dishwasher.
  • Open the oven and put in a pan with some fruit or vinegar.  Wait a while.  Quickly close the door and turn the oven on low or better yet clean the oven with the oven cleaning feature.
  • Clean the laundry room.  Remove any damp items, don't leave dirty laundry around, remove lint.  Make sure liquid soap is tightly capped.
  • Spary with windex.  When they fall they give them another shot and they will die.
  • Clean the bathroom, keep trash sealed, put bleach down the sink.
  • Check for leaks in any pipes under the sinks all over the house.
  • Put up sticky fly catchers.
  • Clean the refrigerator pan and check refrigerator to ensure the door seals are still tight by putting a dollar bill on the edge of the door, closing the door and trying to pull the dollar bill out.  If you can pull the dollar bill out get new seals/rubber gaskets.  Then send the dollar bill to me because it is dirty and you don't want dirty bills around.  They might collect flies. Just checking to see if you are still reading.
Fruit flies live about 10 days. So get to work or you will have thousands more by the end of the week.  If you have found any other remedies that work please send them to me.  I will try most anything.

Putting the Garden to Bed


Today I took a break from canning and went out to the vegetable garden to begin to put it to bed for the winter.  My little neighbor Luke came out to help me.  He loved putting on Tim's work gloves and pushing the wheel barrel.

First we picked all the remaining zucchini and yellow squash.  To be honest we have had enough squash for the season.  I have made zucchini bread, chocolate zucchini bread, zucchini brownies, baked, fried, steamed, stir-fried, boiled zucchini, zucchini and eggs, zucchini quiche, zucchini lasagna, ratatouille and spaghetti sauce with zucchini. I have canned zucchini plain in the past and it came out to squishy for me.  Ok live and learn.  I have dehydrated it and it came out really good and was a great addition to winter soups.

We pulled up all the remaining plants and carried them to the compost pile and raked out the garden bed.  The next step I will take will be to put down a layer of composted manuer and cover it with a thick layer of black and white newspaper.  Finally the box will be covered with a layer of black plastic for the winter.  The manuer will continue to compost.  The newspaper will ensure light does not get to the garden so weeds will not grow over the winter and the plastic will hold it all together.  I put rocks around the edge of the garden boxes to hold the plastic down. It is such a comforting sight to see the garden all tucked in for the winter and ready to dream the dream of a new beginning in the spring.

We checked the carrots, beets and potatoes and they are coming along fine.  As soon as the fruit is all canned up we will  attack them next.  For now they are safe in the ground. 


The pumpkins did not do so well this year.  I only have 4 pumpkins.  Usually I get more than that.  Am not sure why the harvest is so small this year but I will try another variety next year.  I will also grow the pumkins on trellises.  I will cook up the pumkins and make curreid pumpkin soup and roast the seeds. Roasted pumpkin seeds make a great, nutritious snack, rich in magnesium, iron and zinc. Here are the directions on how to roast pumpkin seeds:


Rinse pumpkin seeds in water to remove pulp, then spread out in a roasting pan to dry overnight.


• Toss the seeds with a bit of olive oil (or melted butter) and salt. Or, experiment with different seasonings such as cumin, garlic salt, curry powder, or cinnamon and nutmeg.


• Spread seeds out in a single layer and roast in a 300-degree oven for about 45 minutes or until golden brown, stirring occasionally.


• Add roasted pumpkin seeds to salads, sprinkle over pureed soups, or enjoy "as is."


The hubbard squash did exceptionally well.  The largest one weighs 15 lbs!  It is hard to believe the vine was able to hold a hanging squash weighing so much.

The mammouth sunflowers grew to almost 12 feet.  We cut the heads off and are drying them so they can be feed to the birds this winter.  In the September/October 2009 issue of Gardening How-To, Michelle Leise wrote about growing sunflowers. If you grow sunflowers, you may want to harvest the seeds. Here are some simple instructions for preparing them.


Let the seeds dry. First, leave the seeds on the flower to dry. You may have to add a lightweight cover, like cheesecloth, to keep nature from beating you to the goodies.


How to roast sunflower kernels


To create your own roasted seeds, remove the hulls, and place kernels in a shallow pan. A jellyroll pan works well. Roast in a 300°F oven for 30 to 40 minutes, until brown. You’ll need to stir occasionally as the nuts roast. After you’ve removed them from the oven, you may wish to stir in some melted margarine. Use about 1 teaspoon per cup of seeds. Salt seeds, if desired, and place on absorbent paper to cool. Store in a tightly covered container.


How to boil seeds in the hull


Here’s how to create the mouth-numbing salty treat from your childhood. Place the unhulled seeds in a pan and cover with salt water. For the salt water, use ¼ to ½ cup of salt for 2 quarts of water. Soak seeds overnight or bring them to a boil and simmer for two hours. Let them dry on absorbent paper. Use the seed-roasting instructions to finish the batch.


If you need an excuse to add sunflower seeds to virtually everything you eat, here it is. Sunflower seeds are a rich source of three vitamins and minerals most Americans don’t eat enough of: Vitamin E, magnesium, and selenium. As an added bonus, they contain a big load of the phytosterols that help lower cholesterol.


Another day out there and the work will be done.  We have really enjoyed the garden this year.  It was beautiful, abundant and fun to work on.  During the winter we plan on enlarging the garden in the backyard and taking out more of the grass. Utimately the plan is to have very little grass and all edible garden area supplemented with flowering plants. 

Tuesday, September 22, 2009

New Storage Unit


I found this storage unit at a yard sale a couple of weeks ago for $40.  It is a buiness storage unit meant for office use that has four sides and swivels.  Two of the sides are shelf units and the other two sides are walls.  By the use of a foot lever the units pivot and swing around so you can access either the storage sides or leave the wall showing thereby hiding the shelves.  I saw this unit and bells went off in my head.  What a perfect unit to store my canning jars and canned goods!  Once I got the three units to the garage with the help of a very good friend we determined if we placed it right inside the garage door when the door is open it would block the view of all the things I have in the garage.  Since I am into preparedness I have stored all sorts of things over the years and really do not want people seeing what I have. This has turned out to be the perfect storage solution.

I used rubber nonskid shelf liner to keep items on the shelfs as the unit swivels and I will be designing some sort of tie system as a second protection to keep jars in place.  One side of the unit has jars that I canned this year and the other side has canned goods.  I am so thrilled with this system that I keep going out there to look at it and gloat.

The unit is seven feet tall and each of the three subunits are 34 inches wide.  The three subunits are hooked together and the entire unit is extremely heavy so it will be difficult to tip it over.  I will be 9ok so Tim will be) drilling bolts into the cement floor to secure it to the floor as protection in the case of an earthquake.

Monday, September 21, 2009

Autumn Canning Classes


Back by popular demand!  Time for more canning classes. 

Beginning Class covers hot water bath canning and the equipment and steps it takes to can high acid foods like fruits, tomatoes, pickles, relishes, jams, jelly and preserves.  I will supply all the equipment and produce and you will go home with some goodies.  This is a hands on class so you get experience and be ready to can up a storm.  Cost is $50 and class runs from 9 to 3 on Saturday September 26th at my home.

Advanced Class covers pressure canning of low acid foods like vegetables, meat, poultry, fish, soups and stews.  Learn to make one jar dinners and learn that the pressure canner is your friend.  This is a hands on class.  You will leave ready to can using a pressure cooker and take home some goodies.  Cost is $50 and class runs from 9 to 3 on Saturday October 3rd at my home.

Call 360-705-9818 Please be prepared to prepay for the class.  Make a reservation today.  Each class will hold only eight students to ensure everyone has amble opportunity to practice.

I will also be at the Yakima Connection Fall Harvest Festival displaying canning goods and equipment.  Please come by to get  and say hello.  The Yakima Connection is on the corner of Mullen Road and Carpenter Road in Lacey, Washington.  I love this stand because it is just a short distance from my home and the produce has been great this year!  I am now spoiled after being able to go around the corner for farm fresh goods.

Sunday, September 20, 2009

Canning Corn


The key to canning corn is time.  If you have extra time it is well worth it.  I happen to like canned corn better than frozen corn so once a year I set aside a couple of days to get the job done.

This year the corn has been excellent.  When it is in season we like to grill it on the gas grill right inside the husks.  First soak it in water then put it on the grill and turn it often.  It steams inside the husks and has a great flavor.

To can corn it must be canned using a pressure canner.  Corn has a low ph level.  Corn can be hot packed or raw packed.  To save time I chose to raw pack my corn.  First shuck the corn and clean off all the silk strings.  Next cut the corn from the cobs.  The corn will come off in long pieces which can be broken up easily into niblets.  Caution.  This is a messy job.  The kernals seem to have a life of their own and fly around the kitchen as they are cut from the ears.  Some people used a special tool to cut corn off the cobs.  I prefer to use a pairing knife.  There are methods using two bowls or an angel food pan or bundt pan to catch the corn.  I use a cutting board and dump the corn into a large stainless steal bowl.  I also scrape the cob to get off all the milk and kernal residue.

 Pack the corn into hot clean quart jars and fill up to the rim with boiling water.  Adding salt is an option.  Clean rims and add lids and rings.  Corn needs to be canned for 85 minutes in the pressure cooker at 10 pounds pressure at low altitude.  Adapt your canning times and pressure depending on where you live.

Do not be surprised if the liquid has a milky appearance as it is only the starch from the corn.  Corn can change color and darken when canned and the water level might drop due to the corn absorbing the liquid.  As long as the lid is sealed all is well.


I took all the husks to the compost pile and threw away the cobs.  In the past I have taken them to friends with cows. I walked down to my mother's home and picked up her dachshund, Tinker.  Tinker likes food, any kind of food.  His nickname is Hoover.  Hoover came down and cleaned up all the corn that had flown around the kitchen and I swear had a smile on his face doing it.  So I have beautiful canned corn, more goodies in my compost pile and a happy dog!  An afternoon well spent.

The Little Deers


No, this is not the deer that was in my back yard last night!  It belongs to Gerald H..  I laughed and laughed when he emailed me this picture today.  I have to admit he was not the only one who contacted me today and suggested I get out my gun and take matters into my own hands.  I have been at war with deer since I moved into this house.  I am not out in the boonies but in a neighborhood on the edge of a greenbelt which boarders the train line that runs from Seattle to Portland.  For some reason the deer like my yard.

When I first moved here a doe and two fawns spent every day napping in my back yard.  At first I thought it was cute.  That is until I planted a garden.  They thought they had found Sizzler's for deer and began to stop by the salad bar often.

I did some research and found a product that claimed to keep deer out of the garden.  It is a netting that is easy to put up, easy to see through and inexpensive.  I invested in a couple of rolls and put it up.  For a few weeks all was fine but as the season progressed and my garden started to flourish the trouble began.  I had put the netting up eight feet high thinking it would be high enough.  Well, it seems the deer were high jumpers and one morning there they were feasting on beet greens looking quite content.  They had not even broken out in a sweat when they jumped the fence.

Next came hanging bars of smelly soap, hair balls from the beauty shop, aol advertisement discs, silver ribbon, urinating around the fence, spraying the veggies with hot pepper juice, firecrackers and a sling shot.  I got pretty good with the sling shot but the silver ball ammunition didn't seem to faze them.  Nothing worked.
The ultimate moment came when I saw the deer jump and dive right through the deer netting.  That was it.  I called the company in New Hampshire.  I explained what had happened and offered to send them pictures of the hole.  They did not flinch and offered to send me back my money.  At least I had my investment back but now I had a fence complete with netting that had huge holes in it. 

So here we are five years later and the problem is still here.  I considered putting up an electric fence but when I priced it out it would have made the cost of tomatoes reach $12.78 a piece!  I am not called the Frugal Fraulein for nothing.  I could not bear to spend that kind of money and decided to just plant more seed each year and be watching for deals on wood to build a different kind of fence. 


I have to admit the gun is gaining appeal.  I have never shot anything other than a tin can and paper targets.  I will need to shift gears from thinking about Bambi to meat in a canning jar!

Saturday, September 19, 2009

Green Beans = Bad to Beautiful


Had a box of green beans given to me yesterday.  I looked in the box and they weren't beautiful.  Seems they were a last pick from a farm and were dirty, bruised, rusted and some were small and limp.  I decided to save what could be saved and went to work.  The beans filled two sinks.  First the sinks were filled with water, beans were washed then the large colendar was filled.  I cut the ends off the beans on the cutting board then cut them into bite size pieces.  As I worked, I pulled out the bruised beans.  They were still really dirty so once they were all cut up I put them back into the sink and soaked them again.  By the end of the washing cutting and culling process, the pile had shrunk by half.  The beans were raw packed in quart jars and topped off with boiling water.  Salt was not added as we are trying not to be saltaholics.  The beans stayed in the pressure cooker for 25 minutes.  I was pleasantly surprised that the 14 quarts really looked pretty good when they were done and I was happy I spent the extra time culling out the bad beans.


 I believe a quart jar will provide Tim and I enough beans for two days and we would use one jar a week. Since that will give us fresh canned beans for 14 weeks, we talked about getting another box which hopefully will be in better shape and generate more quart jars.  It would be nice to have a years worth of fresh beans put away.

Two kinds of beans were planted in my garden this year but the deer nibbled them down every time they began to grow 6 inches high.  I plan on planting three times as many beans next year and seeing if I can devise some sort of fencing to keep Bambi away.  I love green beans and was so disapointed I could not can my own.  I was really looking forward to the purple beans I planted and they were the ones that were the most attractive to the little deers


Tip:  This time of year the fruit flies are out and swarming.  A great tip to get rid of the little devils is to leave a jar or bowl of cider vinegar out on the counter (one can be seen in the green bean picture).  The flies are attracted to the smell and land on the liquid and drown.  I leave at least one out all through the season.  Give it a try!!


You won't believe this!  This is a true story that just happened.  Just as I finished posting this I heard a noise in the back yard.  I turned on the outside light and there were two deer!  They just stood there looking at me saying "would you please just leave us alone we are here to eat your garden".  I called my big bad mean mini dachshund Mister T to come and scare them away.  I had my camera on the kitchen table and grabbed it and started snapping pictures in the dark.  You can see Mister T under the canning table going after the deer and you can see the jars in the picures. 

He barked and barked and the large one went after him and tried to stomp him with her hoof.  I yelled and the deer kept coming towards Mister T.  Then Mister T yelped.  I reached down and picked up a handful of gravel and threw it at the deer and she turned and ran then jumped over the back fence.  Poor Mister T.  His hackles were up and he was growling.  I was afraid the deer had actually stomped him and hurt him but he seems upset but fine.  Now isn't that an odd coincidence since I was just typing about the deer eatting my green beans?  I know ......my thoughts are powerful and I create my own reality.  My heart is still beatting quickly but had to share this story.

Friday, September 18, 2009

Groceries for a Week


I read The Survivalist Blog daily. MD Creekmore linked to a profound article from another site that contained photos of families from various countries and what the family eats in one week. Clink on Family Grocery Pictures to open the website. 

What would a weeks worth of food look like for your family? How many meals are eaten out? How many times do you have food delivered? How much produce is consumed? How much soda is drunk? Check out which families have processed foods and which don’t.  How much does your family spend a week?  All good questions to ponder.

Please look at these pictures slowly and carefully. They made me think what a display of my families weekly consumption would look like and how I would feel if it was posted on the internet. Could I hide the Doritos?

Actually, I am striving to make more items by hand and purchase less processed foods. I will never convince Tim that hot dogs, bacon, bologna and kielbasa are not healthy, but, I can choose other items for myself. I am having fish at least two times a week and one meatless night. With fresh produce still in the garden it is easy to do this time of year. In the winter I will have to be creative with soups made with my canned produce and grains.

Thursday, September 17, 2009

Cherry Tomato Transformation

The cherry tomatoes are abundant this year so I decided to make some sauce.  I can only eat so many in salads and Tim won't touch an uncooked tomato.
I cleaned them well, cut the large ones in half and put them in the crock pot.  I added a bit of minced onion, minced garlic, oregano, salt, pepper and cooked them overnight on low heat.  This morning I pureed them skins, seeds and all.  When I tasted the sauce it was a bite acidy so I added some sugar to taste.  I processed them 35 minutes in a hot water bath and ended up with 4 pint of yummy sauce. 

I could have grated carrots to sweeten up my sauce but I might have had to resort to using the pressure canner to be sure the proper heat was reached to kill all the enzymes, bacteria, mold and fungus in the mixed veggetables.  I wanted to use the hot water bath method and get the job done!

Did you know that when you open your jars and cook up your home made sauce that a great addition is a half cup or so of uncooked lentils (the more sauce you cook the more lentils you can add and it doesn't matter what color lentils you use either)?  Lentils will give you added protein and make the sauce more fullfilling.  I really like the heartiness of lentil-tomato sauce and even children like it.  Most often people have not noticed they were there until I mention to them what I added.  *I don't can the lentils in the sauce I add them later when I use the sauce.

Tomorrow I have 2 lugs of tomatoes, 2 lugs of green beans and one lug of medium pickling cucumbers coming so guess what I will be doing on Saturday?

Monday, September 14, 2009

Yakima Connection Produce Stand Fall Harvest Festival

Garrett ,owner, of the Yakima Connection produce stand on the corner of Mullen Road and Carpenter Road in Lacey, WA will be closing down for the season on September 30th.  September 25th and 27th the last of the fall harvest will be arriving from the farms.  Please stop by for some fabulous prices on food direct from the fields.  This stand has been extremely popular this summer.  By 4:00 each day, the parking lot is filled with people coming home from work and shopping for a fresh dinner of summer's bounty.


 9/16/09  Thursday Special 
Boxes of Peaches slightly bruised ready for canning only $5 a box!!!! 

35 ears of corn for $5!!!!!!!!!!!!!!!!!!!!  or 7 ears for only $1 !!!!!!!Get it while it is available.  It is the end of the season.  Corn has been extremely good this year.  Truck will arrive after 4 pm today

600-700 lbs of watermellon for only $40  Watermellon blow-out sale!  Watermellon can be made into wine, dehydrated for delicious candy like fruit leather, rinds can be pickled or you can get enough watermellon to feed an army this weekend.


Canning prices
Peaches         20 lb lug................$18.95
Pears             20 lb lug................$12.98
Tomatoes      24 lb lug................$14.98
Beets             25 lb bag...............$16.00


Call Garrett to order lugs of fruit for canning and he will have them delivered fresh.  Give him at least a two day notice. I ordered green beans and cukes for pickles and they had been picked that morning!!!    360-561-0523

Cabbage


Eight large cabbage heads grew in my garden this summer.  Tim, being the Irishman that he is, loves corned beef dinner.  The cabbages were grown especially for him.  In the past week and a half, he has prepared 2 complete boiled dinners including corned beef, a whole head of fresh cabbage, yukon gold potatoes, carrots and onions.  The house is  filled with the familar aroma of cabbage.  The first dinner smells so good but after reheating the leftovers it gets a bit strong for me and looses it's appeal.  I guess my wee bit of Irish blood is not as strong as his third generation genetics.

Today Tim picked the five remaining cabbage heads before the slugs chewed too deeply into them.  Since we eat only one bottle of sauerkraut in a year it is simplier to purchase a bottle and leave the fermenting process to someone else.  We do not have a root celler for fresh storagge so the choices are freezing, dehydrating or pressure canning.  The freezer is full so this year I will can and dehydrate some for soups.  If I act quickly I won't have to endure a third boiled dinner so soon!

To can cabbage, remove the outter layers and wash with water to remove any insects or slugs.  Cut into pieces that will fit into the jars and try to leave a piece of the core to keep it formed together.  Blanch for 3 minutes then fill the jars and cover with boiling water.  Leave 1 inch of headroom.  Options:  add some peppercorns, and sea salt to season.  Adjust lids, process in a pressure canner at 10 pounds pressure .  Pints - 45 minutes and quarts - 55 minutes.


To dehydrate cabbage remove outer leaves and wash to remove bugs.  Cut away any brown or spoiled areas.  Slice into strips and blanch for 2 minutes.  Drain and put into ice water.  Use a salad spinner or blot with paper towels to remove excess water.  Lay in a single layer on dehydrator racks and follow dryer instructions.  Instructions on drying time will vary depending on model used.  Once dry the cabbage will be brittle to the touch.  Store in glass jars or use a food saver.  Store in a dark cool place.

Cabbage is a great additive to winter soups and stews.

Blancing fixes color, flavor and stops enzyme action which otherwise would continue to mature the produce.

My posts have been less frequent this month because I have been called to care for a sweet woman who is in the final chapter of her very full life.  It is an honor to assits heer but the 12 hour days leave me little time for blogging.  Nap time gives me a moment to daydream new postings.  They will appear as soon as I have a few alone moments.  Thanks for bearing with me.

Tuesday, September 8, 2009

Q & A

If you have a canning question please send it to me via the comment link at the bottom of the site.  I will research and answer or refer you to another site so that everyone can benefit from the question and answer!

Monday, September 7, 2009

New Recommended Blog Sites

I would like to recommend two more Blogs.  The first is Simply Canning.  Sharon does an excellent job writing about all aspects of canning and has a great Q and A section (that I hope to one day create on my site.  Modeling is a high form of complement in my book!).  Please go check out her site and I guarantee you will learn something new.  I know I did.
The other Blog is one I have watched for a couple of years.  The Survivalist  covers many subjects that have to do with survival and preparedness.  It may be a little radical  for some folks but between the articles on guns and making smoke bombs there are tips on food storage, preparedness and homesteading.  Give it a try.  I am going to write and article for The Survivalist and be posted as a guest author!!
Both of these sites have a weekly or daily feature that sends emails announcing what is new.  I like this feature and am looking into adding it to my blog as well.  You can scan the email and decide if you want to open it now or save for later.
I am interested if any of you have suggestions or items you would like me to address.  Please leave a comment.  To leave a comment just hover your mouse over the word comment below each article and click.  A window will open in which you can post your comment.  Thanks everyone for humoring my canning alter ego and giving me feedback.  FF

Friday, September 4, 2009

Tuna Thursday

Yesterday was Tuna Thursday. A local fisherman found me through a flyer and asked if I would can his fresh tuna in exchange for a percentage of the catch. Since I had not canned tuna before ( have canned lots of salmon) and really and truly had it on my bucket list I took the bait. The deal was he would supply the fish ready to can and the jars and I would do the canning.


His first lesson was never to go last minute to find 7 cases of wide mouth 1/2 pint canning jars in early September. After stopping at several stores with empty shelves, he ended up at a True Value hardware store and spent $13 per box - ouch! A word of advice to Fishermen, go secure your jars before you go fishing and you will save money.


My first task was to clean the kitchen sinks, counters and equipment with a bleach mixture. I had a new plastic table cloth which I wiped down and put on the kitchen table.


The next task was to wash all the jars. It took two rounds in my dishwasher. I found out I can get three dozen jars in a load. I suppose I could have washed all the jars by hand but I wanted them sterilized too. Since I really don't like washing dishes, I think it was most efficient to use the machine. The fellow wanted mostly 1/2 pint jars which meant more jars to wash than if he had chosen pints. 1/2 pint hold more fish than a typical tuna can from the store. I am sure you have noticed that the amount and quality of canned tuna has changed since we were kids and home canned tuna really makes that evident.


The fish arrived on ice in a huge cooler packaged in plastic bags.

Tuna is cut into what they call loins. The pieces actually look like pork loins and I thought they looked a bit like corned beef because of the fatty area on the belly. The loins were rinsed off to be sure all scales were gone and put on the cutting board. "Tuna Tim" cut the loins into rounds about 2" long for the 1/2 pints and 4" for the pints.


I packed the fish into jars. It is necessary to push the fish down tightly to avoid air pockets and maximize the contents. Depending on how thick the loin was, two chunks could fit side by side and there was room for some of the belly meat on top.
A1/4 teaspoon of kosher salt was added. In my research, I read about various ingredients that could be added for flavor and moistness. Some canners added water to the top of the head space level and others added two teaspoons of good quality olive oil. Since the tuna had a healthy amount of natural fat it did not seem necessary to ad extra oil. The results proved this to be true. Personally I do not like tuna packed in oil (memory of a sailing trip, oil packed tuna and seasickness pops up). Too much oil can interfere with the canning process. I added dill and garlic to some jars. Many things can be added including jalapeno peppers, garlic, sage, rosemary, hot sauce, dill, pre made salad dressings.


To get the oily fish juice off the rims of the jars, paper towels were dipped into white vinegar and the lids were wiped clean. This seemed to work well and the vinegar was a relief from the fishy smell in the kitchen.

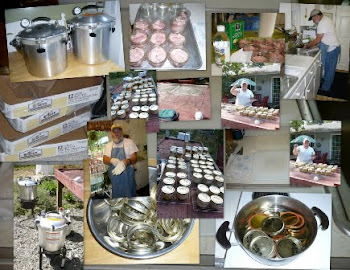
We used tow All American pressure cookers and did the processing outdoors. Fried turkey propane cookers work really well and kept the heat at a fairly consistent level to keep the pressure canners at 11 pounds of pressure for 100 minutes. It took less time to bring the pressure down after cooking because we were working outdoors so we could open the canners and unpack them onto the canning table outside. All those cooling racks we have collected over the years came in handy for this project.

Then we repeated the entire process three times and ended up with 48 1/2 pints and 15 pints for the fisherman and some additional pints for us. I actually took one quarter of the fish and canned mine separately. It was a long day and I have to admit the house still smells fishy even though I cleaned with bleach again afterwards but the tuna is beautiful!

Oh I forgot to mention the fisherman also brined and smoked some of the catch for a few hours before canning. That fish turned a beautiful umber color and smelled great. I do not have much experience using a smoker. I do own one (guess where I got it?) and will now get it out and get some practice using it. My neighbor has been giving me salmon and we plan on smoking the next batch he catches.

I have now learned to can tuna and crossed off another item from by bucket list. This is a labor of love and canning your own tuna is very doable. If i were to can for money, I would have to charge between $3 and $4 a jar. If you figure the time it takes to wash jars, pack jars, bring canner up to pressure 20 minutes, pressure can 100 minutes, cool down 25 minutes, cool jars then wash it is time intensive and costly. We were at it about 8 hours yesterday and we had two canners going. Hmmmmm what will be next?